How to Add Google Adsense in Blogger Manually
After launching the new version of
blogger(blogspot), It is attracting many websites developers and blog
writers. Most of the seo love to work on blogspot due to its quick
results in search engine.
Now Google Blogspot provides a feature
to monetize your blog by giving some predefined position in blog
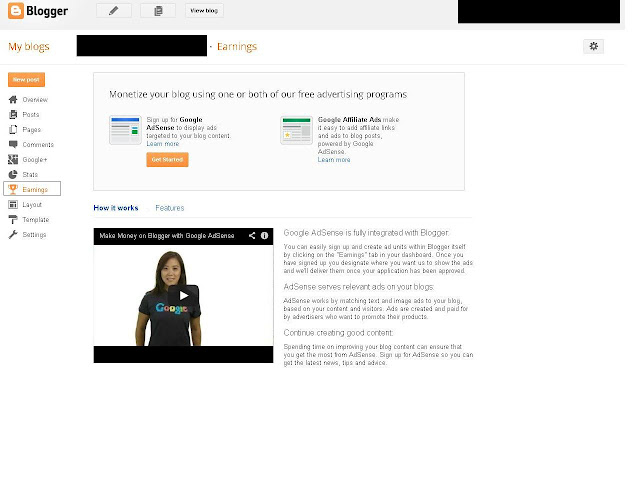
theme layout. To monitize your blog you need to apply for google
adsense or if you already have an adsense account then you have to
activate your adsense for your blog. You can also give details of
any other adsense account you have. See here how
 |
| How to Link Blogger to Adsense |
 |
| Link Existing or Other google Adsense Account |
 |
| Apply for New Adsense Account |
How to Add Adsense in Blogger
First I will show you the normal
procedure of adding google adsense and later provide you some tricks
to add it manually at any position.
Adsense Widget in Blogger
- Goto www.blogger.com and login with your registered id for your blog
- Find and click on your blog
- From the menus on your left click on “Layout”
- In your layout you will get different position to “Add a widget”
- Click on “Add a widget” wherever you want your ad to come
- From the list of widgets search for Adsense and click Add
- Once you click on add, It will show you list of ad format. Select one suitable for your postion
- Save your layout and Your ad is ready for you. Click “view blog” to see your ads
Uptill now I have shown you how to add
google ads in a normal way. Now I will show you how to configure
google adsense manually.
How to add Google Adsense manually in Blogger
Remember here you dont require to link
your adsense account to blogger. You just require to create your ad
tags from Adsense or GAM . And then add in the blogger template file
manually.
Generate ad tags from adsense.
- Login to your adsense account.
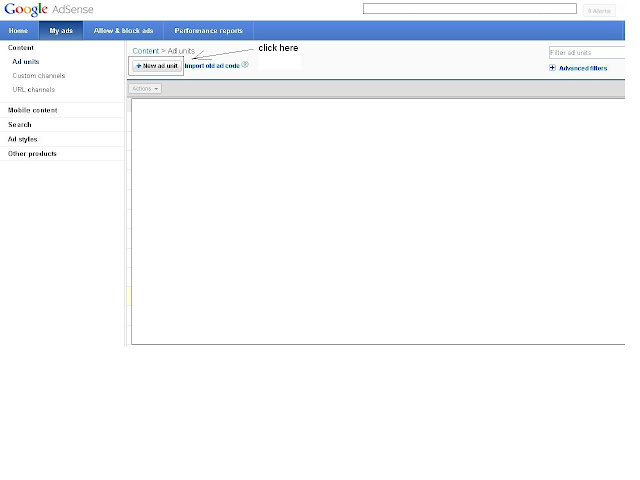
- Click on Myad in top navigation
- on Myad page you will see create an ad link on the top. Click on it and you will be redirected to a page to set up your ad unit.
- Choose size and look of your ad and then click “Save and Get Code” button at the bottom.
Here are the screenshots for your help
 |
| Stepp 1-3 Create a new Adsense Ad |
 |
| New Adsense Ad unit Properties |
 |
| Google Adsense New Ad unit Code |
In the next step you have to convert
your ad code according to blogger template file which is a XML file
and not support direct code normally. You can check with your deirect
code too but in most of the cases that won't work.
How to Convert Google Ad code for Blogger
To convert your ad code there are many
online tool but you can do this on your own. Just do few replacements
like
- Replace less then symbol “<” with “<”
- Replace greater then symbol “>” with “>”
- Replace quotes (“) with “quot;”
After these three simple replacements
your code is ready for blogger
Now Lets open the template file where
we need to put these codes. For this you need to login and come to
your blogger dashboard. Follow the screenshots below
 |
| How to edit Blogger Template |
 |
| Edit Blogger Template
After these steps you are ready with
your google ad units and your template file to modify. Only thing
left is to decide and implement your google adsense ad at any
position on blogger.
Lets start with few combinations
728 x 290 Leader board ad on all pages below Page heading:
Heading can be H2, H3 or anything. So
you have to check what tag your template has been using. Now search
for the following code
<div class='post-header'>
Above this code there will be code like
this:
<div class='post hentry uncustomized-post-template'>
Here if you wants to show your ad only
on post pages and not on anyother listing pages like labels, search
or homepage.Just ad your code as in the following code
<div class='post hentry uncustomized-post-template'>
Once you are done with this step, You
preview your blog for changes.
336 x 280 block ad inside content
below heading
Here you have to find the following
code
<data:post.body/>
and above it paste your ad code as
<b:if cond='data:blog.pageType == "item"'>
Remember when you search for the above
code it can have more then one occurrence, You need to check it with
the every one (hit and trial) as this code placement is different in
different themes.
If you want more then kindly share your
exact reuirement in the comments below. We will try to help you as
soon as possible.
Keep Checking this blog for more tips
and tricks.
|
Tags: Blogger, Blogspot Tutorials, Google Adsense
Subscribe to:
Post Comments (Atom)


Share your views...
0 Respones to "How to Add Google Adsense in Blogger Manually"
Post a Comment